3 ways to better secure your Facebook account
It’s been a little while since we’ve checked out the security measures that Facebook has to keep your account safe.
Since Facebook is always changing things up, we thought it was about time we took a fresh look at what settings you should check to protect your account.
1. Keep your posts, photos, and biographical information out of public view
It’s always prudent to keep your posts out of the public eye – posts you make publicly can reveal lots of juicy details about your life, friends, and family that are a goldmine for someone with less-than-kind purposes.
Every time you post an update on Facebook, you can choose the Privacy level in the drop-down menu to the left of the “Post” button. We recommend choosing “Friends” or any other filter other than “Public.”
Make sure to check this privacy setting every time you post, as it tends to like to default back to “Public”!
If you’re not sure if your previous Facebook updates (including statuses and photos) are friends-only or not, you can limit all previous activity pretty easily. Here’s how:
- When logged in on a desktop computer: Click the padlock icon at the upper right and then click “See more settings” at the bottom of the menu.
- Via the Facebook mobile app: Click “More” at the bottom right of the screen, scroll down to “Privacy Shortcuts,” and then hit “More settings” at the bottom and then “Privacy.”
Now you’ll want to select “Limit the audience for posts you’ve shared with friends of friends or Public.”
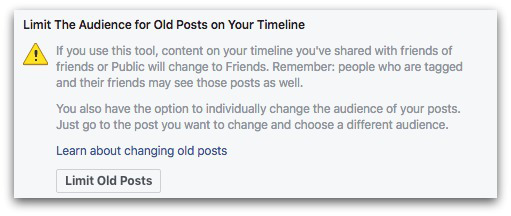
Clicking “Limit Old Posts” will make everything you’ve posted in the past visible only to your friends. Facebook will give you a somewhat scary-sounding disclaimer that this one-click change is permanent and can’t be undone, but it’s one of the best moves you can make to secure your account!
Another thing to keep in mind is that Facebook keeps adding more features on your profile that are public by default and cannot be changed. It used to be just your profile photo, and then your cover photo, but now there’s an “Intro” area where you can “describe who you are” and also add up to 5 featured photos.
When in doubt, use the “View as” option in your profile to make sure you’re keeping your posts and activity private.
To do this, navigate to your profile and click the “…” on your cover photo and see what your profile looks like to the general public. If you see anything there you don’t want featured, it’s best to make it friends-only, or delete it.
(Remember, many websites now use Facebook for leaving comments on news articles, blogs, etc. If you leave comments on those sites, or even hit “share” on the article to show your Facebook friends, that kind of activity can still appear on your timeline as public.)
2. Restrict how you appear in search or who can send you a friend request
With Facebook being as massive as it is, you want to make it as hard as possible for spammers (of which there are many on Facebook!) to find you. To do that, you want to prevent them from even adding you in the first place.
Make sure the only people who can add you, search for you or message you are people you either already know, or at least are known by your friends. You can control this in the Privacy settings.
- When logged in on a desktop computer: Click the padlock icon at the upper right and then click “See more settings” at the bottom of the menu.
- Via the Facebook mobile app: Click “More” at the bottom right of the screen, scroll down to “Privacy Shortcuts,” and then hit “More settings” at the bottom and then “Privacy.”
Then check sure the following settings:
- Who can contact me/send me friend requests – Friends of Friends (not Everyone)
- Who can look me up using my email address/phone number – Friends, or Friends of Friends
Unfortunately, Facebook removed the setting that allows you to completely restrict or filter who can contact you, so be especially wary of anything sent to you in your filtered “message requests” inbox, and never ever click unknown links!
3. Set up login alerts and – if you’re comfortable giving Facebook your mobile number – login approvals
- When logged in on a desktop computer: Click the padlock icon at the upper right and then click “See more settings” at the bottom of the menu. On the left hand side, choose “Security”
- Via the Facebook mobile app: Click “More” at the bottom right of the screen, scroll down to “Settings,” and then hit “Account settings”. Then click “”Security.”
You’ll see an option to enable Login Alerts, which means Facebook will send you a notification if it sees someone trying to log in from a browser or device it hasn’t seen you use before.
It may just be a false alarm from you using a hotel computer while on vacation, or it may be someone trying to log in as you from their own laptop – either way, Facebook will let you know immediately so you can take action, if necessary.
Enable Login Alerts by clicking on “Login Alerts” on your phone, or “Edit” on your desktop, and choose how you’d like to receive your alerts.
There’s an argument to be made for keeping your phone details off Facebook entirely – it’s yet another level of personal information that many people would rather keep out of Facebook’s gaping maw.
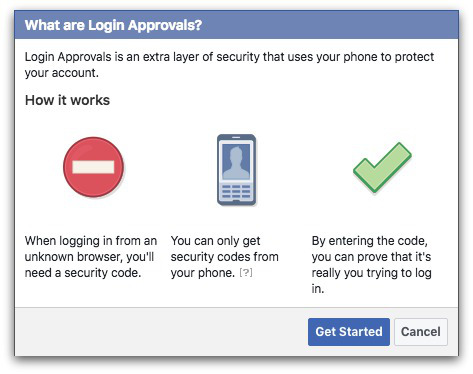
That said, you do need to enter a legitimate mobile phone number into Facebook to enable a strong added layer of security. So if you are comfortable with Facebook having access to your phone number, enable Login Approvals – it’s Facebook’s version of two-factor authentication.
Now, every time you log in from a browser or device that Facebook hasn’t seen you use before, you will get a code sent to your registered mobile device that you will need to enter into Facebook to continue logging in.
The idea is that hopefully someone trying to break in to your account wouldn’t have access to your mobile phone, and without the code sent to your phone, they can’t proceed to use your account.
To set up Login Approvals, go to the Security menu under Settings, and check the box next to “Login Approvals On” on your phone, or “Edit” and then “Require a security code to access my account from unknown browsers” on your desktop.
Make sure to have your mobile phone handy, as this will kick off a process to activate the Facebook Code Generator as well as register your phone number to your account.
—
Always remember that even after restricting who can see your posts on Facebook, anything you post to the internet has a long half-life.
Discretion goes a long way. If you have any concern about someone seeing something about your life that you might not want in the public view, think twice about posting it on Facebook or anywhere else online – regardless of your privacy settings.
How about you? Is your Facebook profile a completely open book, or is your birthday set to 01/01/1900? Let us know in the comments.
Follow @mvarmazis
Follow @NakedSecurity
Article source: http://feedproxy.google.com/~r/nakedsecurity/~3/XklxVgWydTo/